


Steps to Design Concrete Footings
Concrete Footings: A Simple Guide to a Strong Foundation
Concrete footings are crucial for the stability and longevity of any structure. Follow these practical steps to design concrete footings with confidence.

Understanding the Basics of Concrete Footings
Concrete footings are the foundational elements that transfer the load of a building to the ground. Proper footing design is crucial for preventing settlement and ensuring structural integrity. Let's break down the essential steps involved in designing these components.
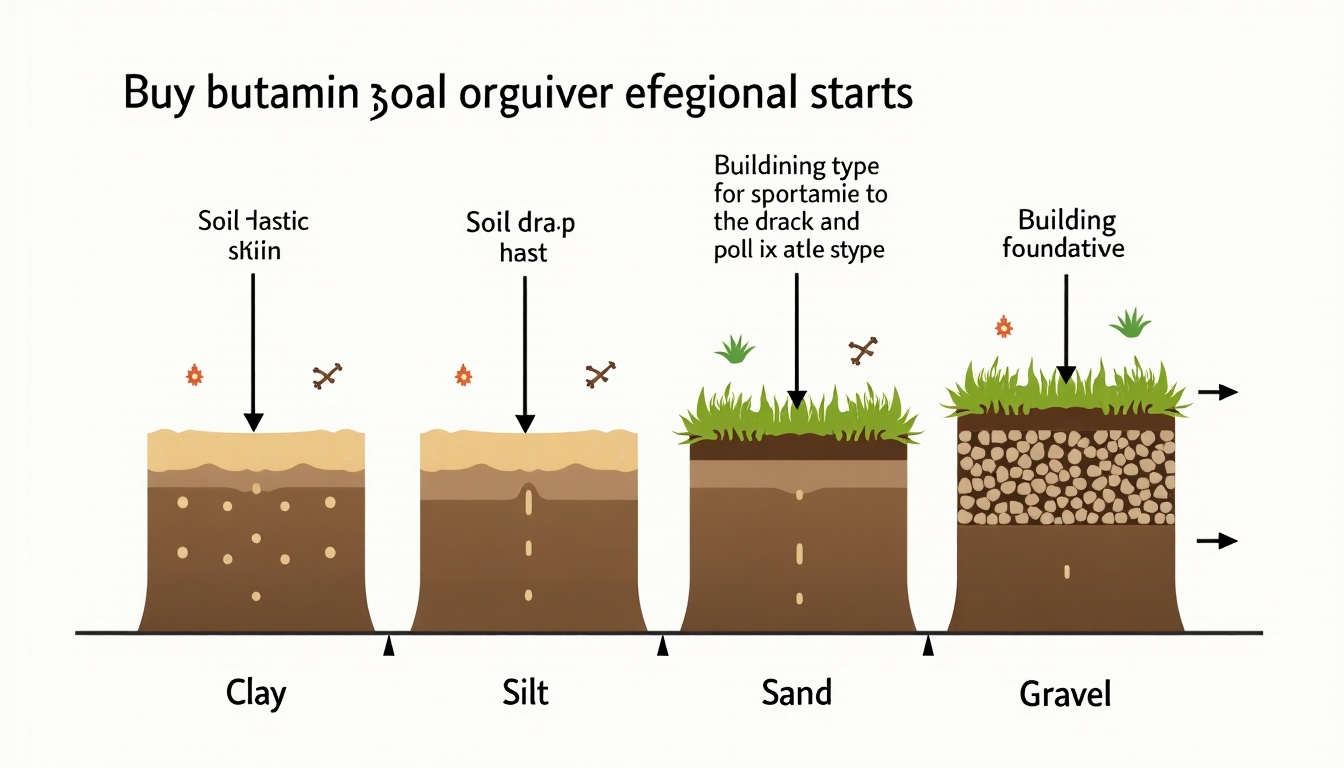
1. Site Assessment
Before diving into the design process, assess the construction site. Consider soil type, load-bearing capacity, and other geological factors. Here's a handy checklist to start with:
- Soil Type: Identify if the soil is sandy, clayey, or loamy.
- Load Capacity: Understand the weight the footing needs to support.
- Water Table Level: Check for the depth of the water table to prevent wet conditions from affecting the footing.
- Environmental Conditions: Consider potential frost lines or seismic activities.
Conducting these assessments will ensure you know what kind of concrete footing design suits your project best.
Step-by-Step Guide to Designing Concrete Footings
Designing concrete footings involves a meticulous process. Here, we'll delve into the steps, instilling confidence through practical tips and personal insights gathered over years of experience.
2. Calculating Load Requirements
Start by determining the total load the footing will bear. This includes the weight of the structure, live loads (like furniture and occupants), and environmental factors like snow or wind loads.
Footing Calculation Formula: Weight of the Structure + Live Load + Environmental Load = Total Load
Knowing the total load is key to ensuring your footings are neither oversized nor undersized, optimizing both safety and cost.

3. Determining Footing Size and Depth
Once you have the total load, calculate the size and depth of the footings. This is crucial for distributing the load across a larger area to prevent sinking or shifting. A typical approach is:
- Footing Width: Should be two times the wall thickness.
- Footing Depth: Minimum of 12 inches below the frost line or as calculated based on soil conditions.
These dimensions can vary, so always consult local building codes for specifics.
4. Material Selection and Reinforcement
Choosing the right concrete mix and reinforcement is vital. Opt for a high-strength mix, typically a mix ratio of 1:2:3 (cement:sand:gravel), and reinforce with rebar to enhance strength.
Concrete Mix Table
| Ingredient | Ratio |
|---|---|
| Cement | 1 |
| Sand | 2 |
| Gravel | 3 |
Rebar should be placed strategically, usually in a grid pattern, to support tension and compression.
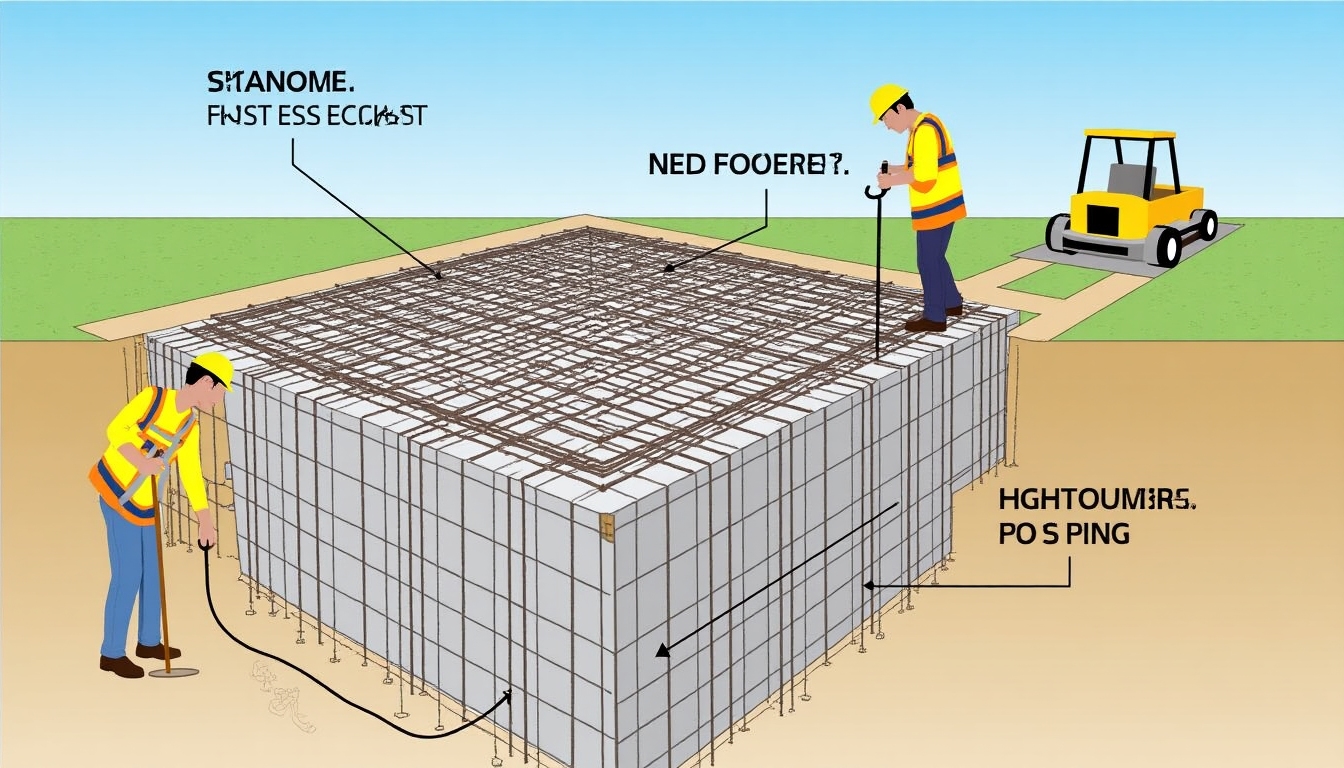
5. Pouring and Curing the Footings
Pour the concrete once the rebar is in place. Ensure even pouring to avoid air pockets. The key to a strong footing is proper curing:
- Keep the Concrete Moist: Spray water on the surface regularly.
- Maintain Temperature: Ensure the concrete isn’t exposed to extreme cold or heat.
- Time: Allow a curing period of at least 7 days for basic strength, and up to 28 days for full strength.
Monitor the curing process closely to prevent any structural compromises.

In Summary
Designing concrete footings involves careful planning and execution. By assessing site conditions, calculating load requirements, choosing the right materials, and ensuring proper curing, you'll ensure a robust foundation. Remember, every detail counts.
Explore further insights and deepen your understanding of construction and design practices with these recommended articles.